「The Ultimate Dropbox Toolkit & Guide」で紹介されている、Mac/Winの「書類」フォルダをDropboxで同期する方法を試してみました。
Use Dropbox As Your Documents Folderというのが、その方法です。
Setting your Documents directory to be located in your Dropbox directory will keep all your files safe and secure, not to mention synchronized with other computers you may use frequently.
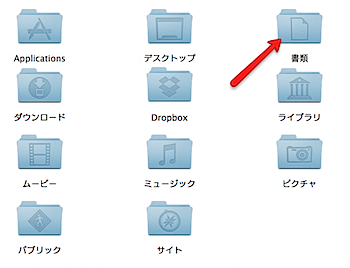
Macの「書類」フォルダをDropboxに置くことが出来れば、他のマシンから参照したり、もちろんiPhoneからもブラウズできますし、バックアップの代わりにもなります。
ということで、以下がその方法です。まずはMacから。
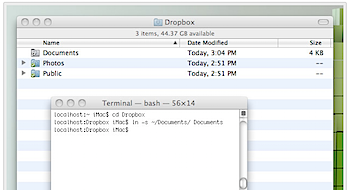
To do this in OS X, open Terminal and navigate to your Dropbox directory (Type: cd Dropbox ). You’ll now need to create a symbolic link to your Documents directory (Type: ln -s ~/Documents/ Documents ). That’s it! You’re done!
アプリケーション>ユーティリティの中にある「ターミナル」を起動し、いくつかのコマンドを入力するだけです。
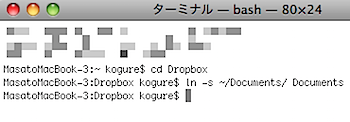
cd Dropbox
ln -s ~/Documents/ Documents
たったこれだけです。
これでDropboxに「Documents」という新たなフォルダ(シンボリックリンクされたもの)が作成され、ジャンジャカ同期が始まります。
追記:
シンボリックリンクの削除は「rm Documents」です。
▼シンボリックリンクとは【symbolic link】 : IT用語辞典
あるファイルやディレクトリに別の名前を与え、ユーザやアプリケーションがその名前をファイル本体と同様に扱えるようにする仕組み。
ちなみに、エイリアスを作成してもいけるかと思ったのですが、エイリアスのフォルダが同期されただけで、シンボリックリンクでないとダメでした。
続いてWindowsの場合。
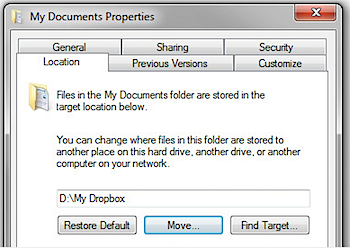
In Windows Vista or Windows 7, right click on your “My Documents” folder and select the Location tab. Next, click Move… and proceed to selecting the location of your Dropbox directory. Simple!
「My Documents」で右クリックをし「Location」タブを選択し‥‥という流れで、こちらもシンプルです。
「Dropbox」については、以下も参考にしてください。
▼「Dropbox」すごい使い方のマニュアル
▼Dropboxの容量を無料で768MB増やす方法


